Everything you need to know about moss poles for your semi-hydroponics system, whether it is LECA or Pon. Give your plant the best environment to grow!
Most people who try using moss poles for their houseplants end up quitting. Why? Because they don’t really get the ins and outs of using moss poles effectively.
Don’t worry, we’ve got your back. We invited you to fire all your beginner questions at us, aiming to clear any hurdles that might be holding you back. This guide is here to help you sidestep common pitfalls and become a moss pole pro in no time.
This guide is shared by @TheLecaQueen.
Where to Get Moss Poles: DIY vs Store-Bought
Cost Comparison
Wondering where I get my moss poles from? Well, I make most of them myself. Why? Because I use a ton of moss poles for my various plants.
For me, making my own moss poles is more cost-effective. I did some quick number-crunching and found that creating a moss pole costs me around $3 or less. That’s because I buy my supplies in bulk.
On the other hand, purchasing a ready-made moss pole could set me back three to five times that amount!
Customization Benefits
But cost isn’t the only factor. When you make your own moss pole, you get to customize it just the way you like.
Store-bought poles are a take-it-or-leave-it deal; you get what you get. But when I craft my own, I can decide on its shape—whether flat, thick, or round. I even have the freedom to create a moss wall if I want!
How to Make a Moss Pole with a Plastic Sheet Back
Why Choose Plastic Sheet Back?
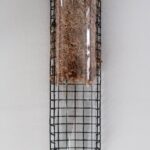
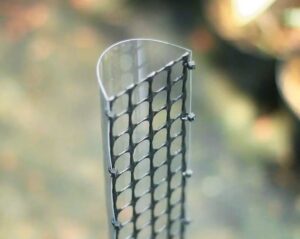
Making a moss pole with a plastic sheet back has become my go-to method lately. Why? Because it retains moisture far better than a regular moss pole.
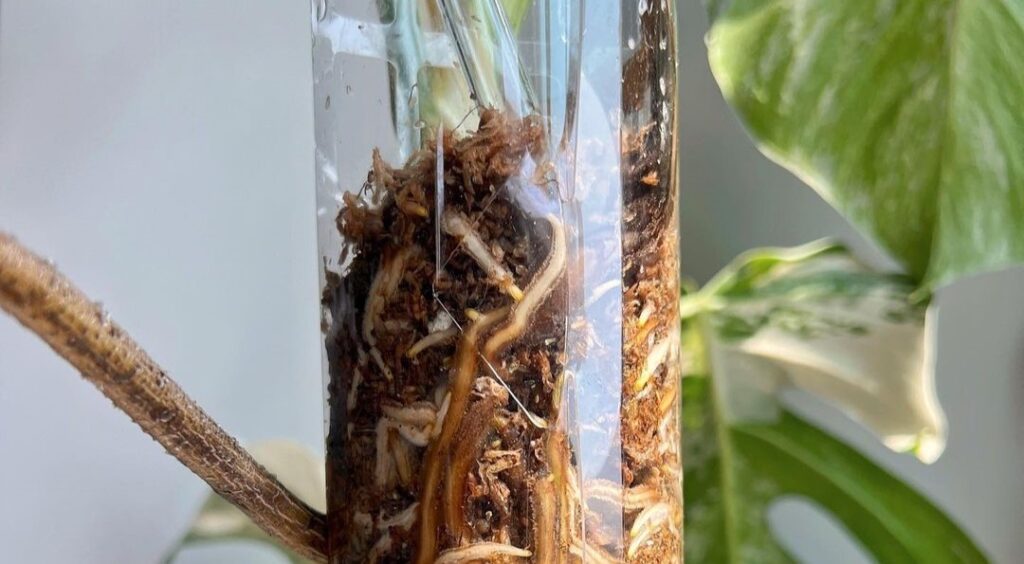
If you use clear plastic, you can also monitor the roots easily.
So if you’re looking for a moss pole that stays moist for longer, this is the way to go.
0. What You’ll Need
- Pre-cut plastic sheet
- Wire mesh
- Tree fern fiber and sphagnum moss mixture
- Cable ties
- Metal rod or garden stake
Step-by-Step Instructions
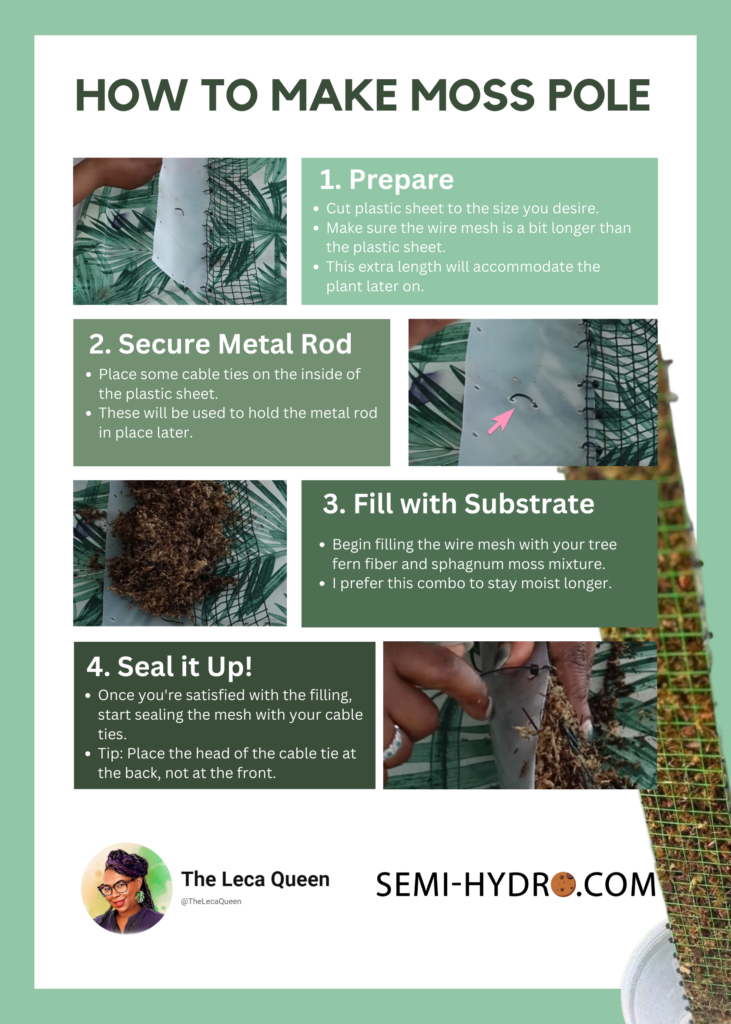
- Prepare the Materials: Firstly, cut your plastic sheet to the size you desire. Make sure the wire mesh is a bit longer than the plastic sheet. This extra length will accommodate the plant later on.
- Secure the garden stake: Place some cable ties on the inside of the plastic sheet. These will be used to hold the garden stake or metal rod in place later.
- Fill with Substrate: Begin filling the wire mesh with your tree fern fiber and sphagnum moss mixture. I prefer this combo because it stays moist longer. Tree fern fiber doesn’t become hydrophobic like sphagnum moss, making it easier to keep wet.
- Seal It Up: Once you’re satisfied with the filling, start sealing the mesh with your cable ties. A quick tip: place the head of the cable tie at the back, not at the front. When you cut off the extra length, the ends can become sharp and might harm your plant’s leaves.
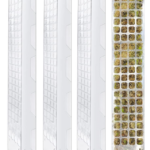
You can also take a look at the infographic below for more a better understanding:
Creating a Buffer Between Moss and Soil/LECA/Pon
- Fold over the top edge of the plastic sheet or wire mesh.
- Secure with one or more cable ties.
- Trim off excess cable tie bits.
Now comes the crucial part—creating a buffer between the moss or other substrate in your moss pole and the soil or LECA/Pon where your plant resides. This ensures that the moss doesn’t mix with the LECA or Pon, keeping each in its own zone.
I fold over the top edge of the plastic sheet or wire mesh that’s holding the moss. This neat little fold acts as a physical barrier, keeping the moss contained within the pole.
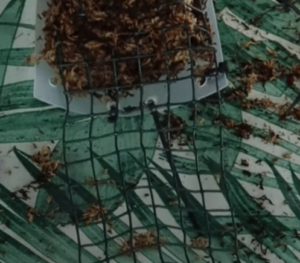
Next, I take a cable tie and loop it through the pre-made holes in my plastic sheet. If you’re using only wire mesh, you can still secure it the same way. Tighten the cable tie to make sure everything is snug and secure.
For added peace of mind, you can use a second cable tie. This ensures that the moss really stays put and doesn’t spill into the LECA or Pon.
Lastly, trim off the excess bits of the cable ties to make it neat. And voila! You have successfully created a moss pole with a built-in buffer to prevent the moss from mixing with your plant’s LECA or soil.
Creating a buffer is a quick and straightforward process. Once you get the hang of it, it becomes second nature. This simple trick helps you keep the moss and LECA or Pon separate, ensuring that each serves its intended purpose without interfering with the other.
Is the Bottom of the Moss Pole Filled with Moss or LECA/Pon
A common question is whether the bottom part of the moss pole should be filled with sphagnum moss or LECA. In simple terms, the answer is a big no for both options.
Why Not Moss?
Filling the bottom with sphagnum moss is a bad idea for several reasons.
- Sphagnum moss retains a lot of moisture. If your moss pole has a reservoir, the moss will soak up all the nutrient solution.
- Constantly moist moss sitting next to your plant’s roots creates a perfect environment for root rot.
Why Not LECA?/Pon
Now, what about LECA/Pon? While some folks who grow plants in soil make a cylinder at the bottom and fill it with soil for stability, I’ve found that this doesn’t work well with LECA or Pon.
The LECA or Pon tends to fall out through the holes in the wire mesh, making it a hassle to maintain.
My Approach
So, how do I handle this?
I simply leave the bottom part empty. This avoids the issues of root rot and nutrient solution being soaked up, while also making it easier to manage the pole.
How to Attach Plants to Moss Poles
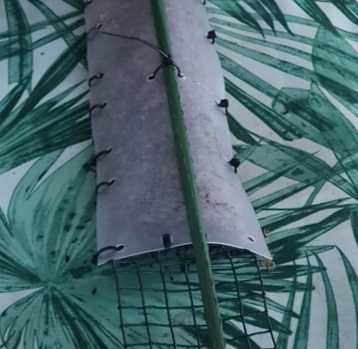
Photo credits @TheLecaQueen
When growing plants in LECA or Pon, the lightweight nature of the medium can make it challenging to keep a moss pole steady. To tackle this, I like to use a metal rod for extra stability.
This is where the cable ties you added while making your moss pole come into play.
- Insert the Metal Rod: Slide the metal rod into the pre-made holes at the bottom of your moss pole. Tighten the cable ties to ensure the rod is securely attached to the pole.
- Leveling with the Pot: Place your pot next to the moss pole to gauge the height at which the pole needs to be. Adjust the metal rod until the moss pole is flush with the pot. If the wire mesh is too long, simply fold it over.
- Position Your Plant: Before placing the moss pole into the pot, attach your plant to it. This step is easier to do outside the pot, especially when using LECA or Pon. Use butterfly clips or soft ties to secure the plant to the moss pole.
- Root Positioning: Pay close attention to the roots. You’ll want them to be far from the moss to prevent root rot.
- Place the Pole in the Pot: Once your plant is securely attached to the moss pole, insert the pole into the pot. Begin filling the pot with LECA or Pon, ensuring the roots are covered but away from the moss.
- Add Stability: Turn the pot around and add more LECA or Pon at the back. This provides additional stability to the moss pole.
- Shake the pot a bit to settle the LECA or Pon, making room for more if needed. Finally, place the pot in the reservoir to complete the setup.
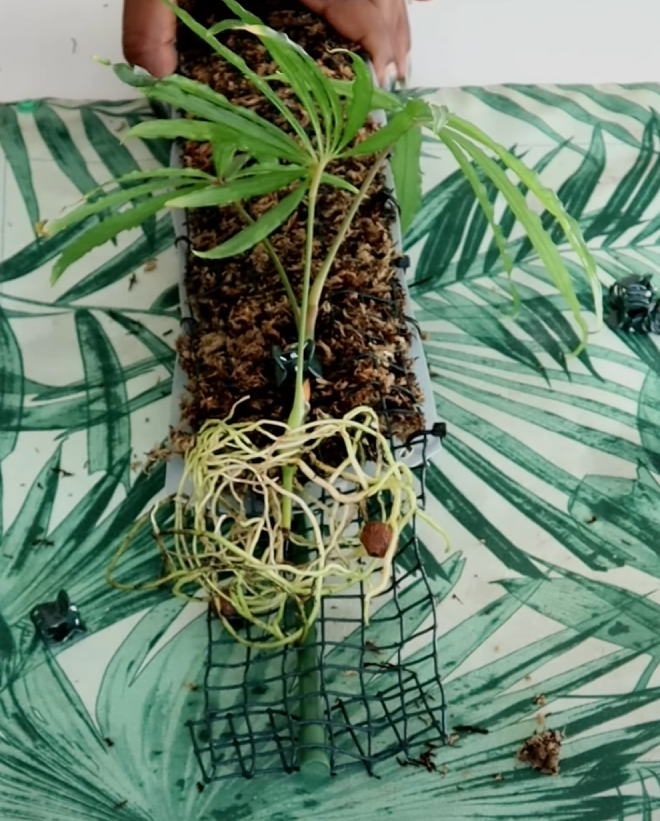
Attaching a metal rod to a moss pole provides the extra stability needed when using a lightweight medium like LECA or Pon. Pre-positioning your plant on the pole makes the process even smoother.
Follow these steps, and you’ll have a thriving, securely anchored plant ready to climb its way to new heights!
When Should I Replace the Moss Inside the Pole?
The question about when or if to replace the moss inside a moss pole is pretty common.
In my experience, there’s usually no need to replace the moss simply because the plant and the pole are always evolving together.
As your plant grows taller, you’ll either be extending the moss pole or making adjustments.
In other words, your moss pole will change as your plant does.
Longevity of Moss
Sphagnum moss, the common material used in moss poles, is organic and will degrade over time. However, this process takes quite a few years—about four to five or even longer. I’ve never had to replace the moss due to degradation.
When to Consider Changing Moss
The only time I’ve personally changed the moss was to switch the medium inside the pole.
For instance, I replaced pure sphagnum moss with a mixture of sphagnum moss and tree fern fiber for better moisture retention.
You might consider replacing the moss if it becomes infested with algae or other contaminants. In such cases, you can carefully replace the moss to ensure a healthier environment for your plant.
Using Tree Fern Fiber in a Moss Pole
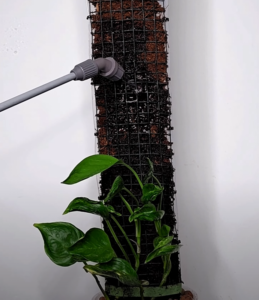
Have I tried using tree fern fiber in a moss pole for plants grown in LECA or Pon? Absolutely! I’ve made poles using solely tree fern fiber as the substrate.
Why Tree Fern Fiber?
What I absolutely adore about using tree fern fiber is its moisture-retaining capabilities. The moment you spray any water or nutrient solution onto it, the fiber absorbs it immediately.
Unlike sphagnum moss, which becomes hydrophobic when dry, tree fern fiber is super easy to rehydrate.
This makes plant care a breeze, as the substrate remains easy to moisten.
Tree fern fiber is a great alternative to sphagnum moss, especially for those growing plants in LECA.
Its superior moisture retention and ease of rehydration make it a fantastic choice for moss poles.
Results
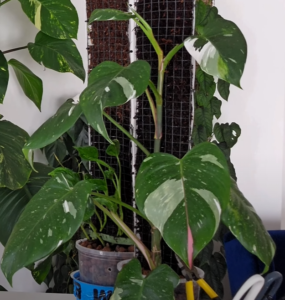
The results have been fantastic. Take the Philodendron White Princess, for instance. The aerial roots at the back of the pole have dug deep into the tree fern fiber, showing signs of excellent growth.
Despite experiencing a Melbourne winter with less-than-ideal lighting conditions, the plant has managed well, and I expect a growth spurt soon.
My Epipremnum Shangri La is also thriving in its tree fern fiber pole.
Where to Buy Moss Poles?
If you’re looking to buy a moss pole similar to the ones we showed above but don’t have the time to DIY, you’re in luck! The market is teeming with pre-made options that come in a variety of designs.
Types of Pre-Made Moss Poles
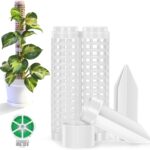
Just like the one we talk in this article, you can find moss poles with a plastic sheet back. These usually come with the wire mesh and cable ties included. All you need to do is add the sphagnum moss.
These are plastic sheets designed in such a way that all you have to do is fold them, and you’ve got yourself a moss pole.
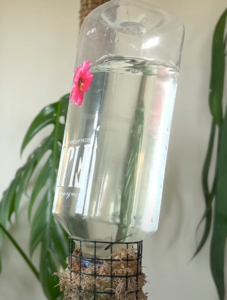
These are quite innovative and come with features like cups at the top to hold water or nutrient solution, which in turn wets your moss pole.
Online marketplaces like Etsy, Amazon, and specialized garden shops often carry a wide range of moss poles. Prices vary based on design and features, so you can pick one that suits your budget and needs.
Considerations When Buying a Pre-Made Moss Pole
- Aesthetic Appeal: First and foremost, consider whether the moss pole fits your aesthetic preferences. Does it look the way you want it to in your space?
- Extendibility: As your plant grows, you’ll likely need to extend the moss pole. Check if the pole you’re considering offers this option. How easy is it to add extensions, and will it remain stable after doing so?
- Stability Features: Speaking of stability, can you attach a metal rod to the moss pole for added support? This feature can be particularly useful if you’re growing plants in a lightweight medium like LECA.
- Self-Watering Option: Some advanced moss poles come with self-watering features. If this appeals to you, it’s something to look out for while shopping.
Moss Pole Alternatives: Other Options for Climbing Plants
The Purpose of a Moss Pole
Before diving into alternatives, it’s essential to understand why we use moss poles in the first place.
Climbing plants, in nature, latch onto trees and other structures to get closer to the sun, deriving water and nutrients in the process.
Moss poles mimic this by providing not only support but also additional nutrients and hydration through the moss.
Why Consider Alternatives?
While moss poles are great, they do require frequent watering. If you’re looking for options that need less maintenance, consider the following:
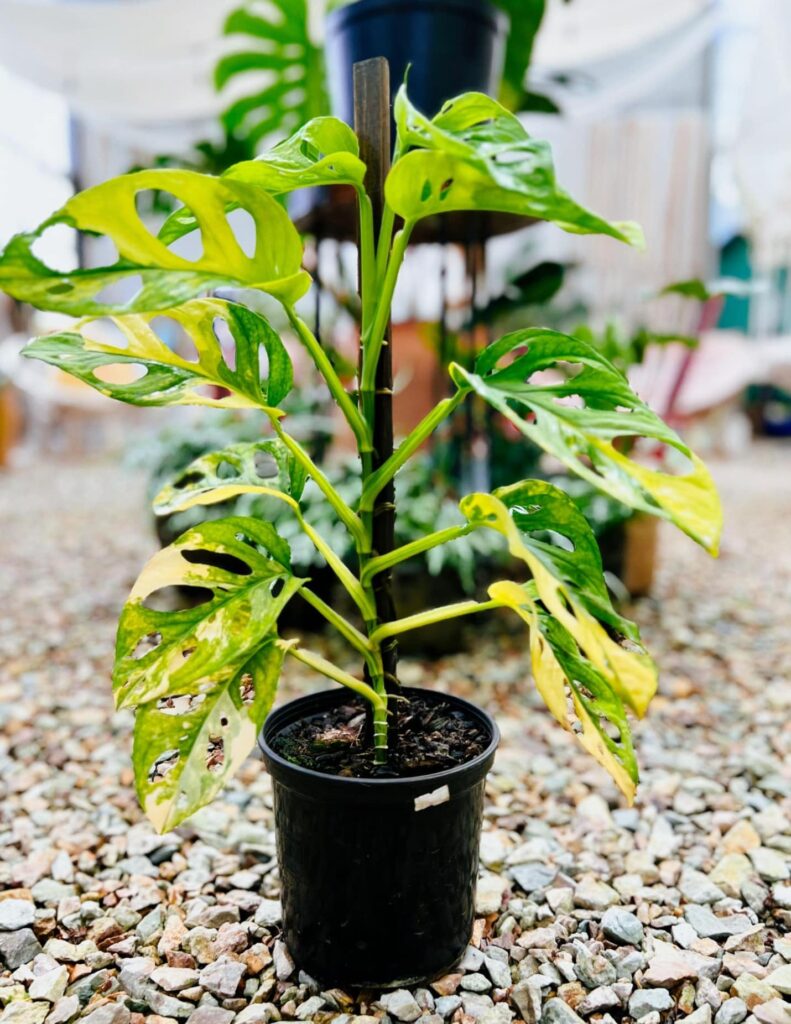
- Trellis: A trellis is a classic alternative that provides plenty of space for your plant to climb. However, it doesn’t offer the added benefit of supplying nutrients and hydration.
- Bamboo Stick: Bamboo sticks are another easy-to-find option that can support your plant. Like trellis, they also don’t provide extra nutrients or water but are a good low-maintenance choice.
- Metal Rod: If you’re particularly concerned about stability, a metal rod might be the way to go. Keep in mind that it won’t provide any additional nourishment to your plant.
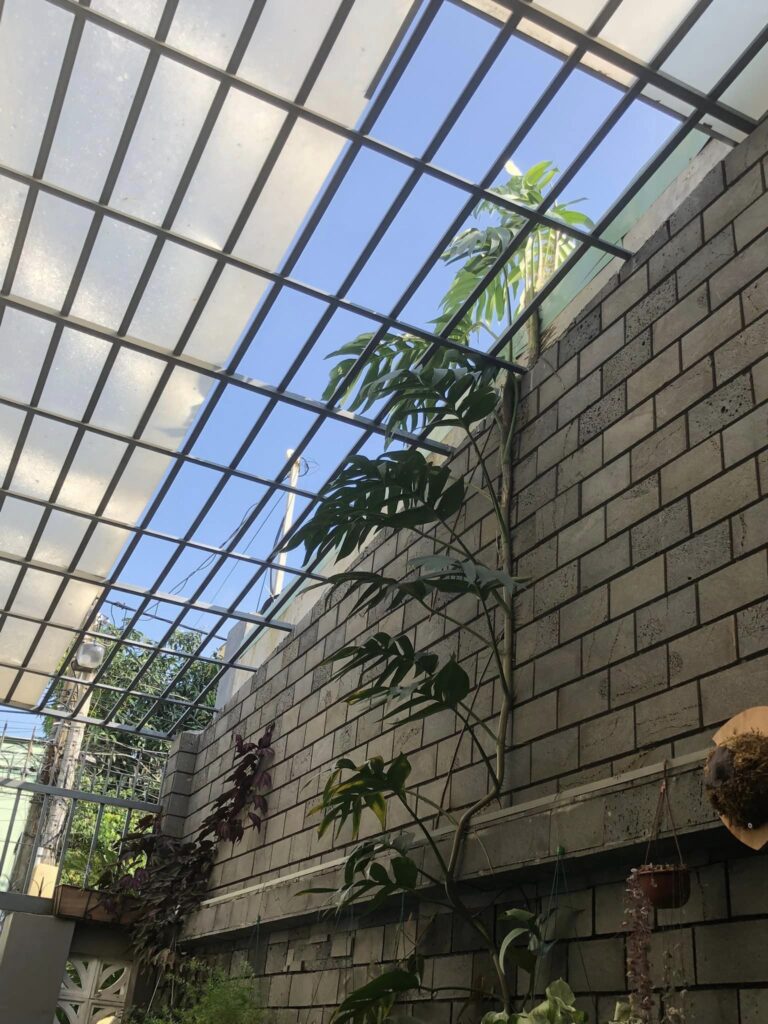
- Let Nature Take Its Course: Plants are quite adaptable. If placed next to a wall or other structure, their aerial roots will often attach themselves and begin to climb naturally.
LECA Pole
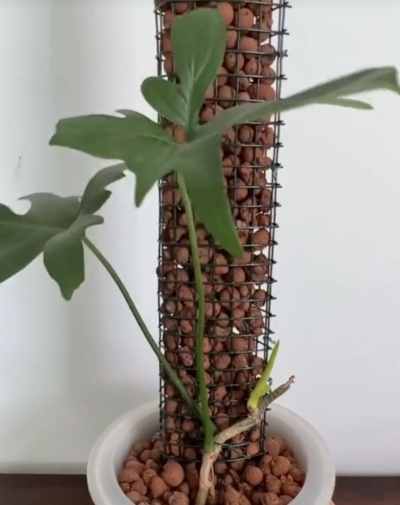
You might have come across the concept of using LECA as a medium in moss poles. While it sounds like an innovative idea, let me be blunt: it generally doesn’t work unless you’re going all out with specialized equipment.
I’ve experimented with this concept. I made a pole filled with LECA and used wicks to draw nutrient solution into the LECA. Despite my best efforts, the LECA stayed dry. This made it tough for the aerial roots to penetrate and latch onto the medium.
Long story short, it was a failed experiment.
Wicks simply can’t keep the LECA moist enough for the plant to benefit. Unlike moss, which can retain moisture, LECA dries out quickly and isn’t effective in this setup.
The only time I’ve seen a LECA-filled pole work is when it’s paired with a pump that continuously supplies nutrient solution. This setup ensures that the LECA stays moist, allowing the aerial roots to grow into it.
Dealing with Mold and Oversaturation in Moss Poles
The Mold Issue
While I personally haven’t experienced mold on my moss poles, I’ve seen it happen to others. Often, this occurs when the sphagnum moss used is already contaminated. Given the right conditions—moisture and poor air circulation—mold will thrive.
Preventing Mold
To avoid this, here are some tips:
- Adequate Ventilation: Make sure there’s good air flow around your moss poles. This could mean keeping a window open or having a fan in the room where your plants are.
- Quality of Moss: Choose a reputable brand of sphagnum moss. Some brands are better at preventing mold growth than others.
Water Oversaturation
When it comes to oversaturation where the moss touches the LECA, I haven’t had that issue. However, if you are concerned, you could create a buffer between the moss and the LECA to prevent excessive moisture transfer.
Moss Saturation
Concerns about moss oversaturation are understandable. However, in my experience, my moss doesn’t get oversaturated.
Here’s why: When I water my moss poles, I make sure to allow time for drainage. I usually let the pole sit for about 10 to 30 minutes to let any excess nutrient solution drain through the moss.
Another thing that helps me avoid oversaturation is controlling the level of the nutrient solution in the reservoir. I don’t fill it up to the top, especially considering that some of the nutrient solution will drain down from the moss pole.
This practice ensures that there is no oversaturation at the point where the moss meets the LECA.
By allowing time for drainage and controlling the nutrient solution level in the reservoir, I’ve been able to successfully prevent moss oversaturation. It’s all about finding the right balance between keeping the moss moist and avoiding excessive wetness.
Algae on Moss Poles
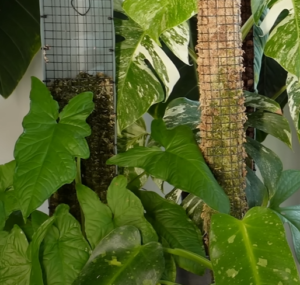
If you’ve noticed your moss pole turning green with algae, don’t panic. In fact, I consider it a sign that I’m doing something right.
Algae spores are ubiquitous; they’re always around us, just waiting for the right conditions to grow.
And what are those conditions? Food, water, and light.
Sound familiar? Those are the same things your plants need to thrive.
Contrary to what some might think, algae on your moss pole isn’t a bad thing. It’s not competing with your plant for nutrients or causing any harm. Most people who are against it are so for aesthetic reasons.
How to Remove Algae
If you’re not a fan of the green look, getting rid of algae is simple. Take your moss pole outside or to a sink and give it a good blast with high-pressure water.
If you’re looking for a more potent solution, you can use 3% hydrogen peroxide. Just apply it to the algae, and it should do the trick.
Can You Reuse Sphagnum Moss?
Yes, you can reuse sphagnum moss, but whether you should is a different question. The main concern is about the sterilization process.
While you can attempt to sterilize used sphagnum moss, there’s no guarantee you’ll eliminate all the tiny critters like bacteria, fungi, or other microbes.
Sphagnum Moss Sterilization Methods
- Boiling Water: One common method is to pour boiling water over the used sphagnum moss. Let it sit until the water cools down. This kills off a majority of microbes.
- Hydrogen Peroxide: This is another effective sterilant. Just like with boiling water, you’d soak the moss and let it sit.
- Bleach: This is a stronger option, but if you go this route, be extra careful. Wear gloves, protect your eyes, and make sure to rinse the moss thoroughly to remove all bleach residues.
To Reuse or Not to Reuse?
While it’s technically possible to reuse sphagnum moss, you’re taking a risk. The sterilization process might not remove 100% of the harmful microorganisms. So, if you decide to go ahead, be aware of these risks.
Adding Cuttings to Plants in LECA or Pon
If you’re considering adding cuttings back into a mother plant growing in LECA or Pon, it’s a bit more challenging than with soil-based plants. With soil, you can easily make a hole, insert the cutting, and you’re good to go.
With LECA and Pon, it’s a different story.
LECA pellets and POn are rigid and don’t allow for easy insertion of new plant cuttings. You can’t just push them aside like you can with soil.
Plus, the existing root system in the medium might be intricate and tightly packed, making it hard to add something new without disturbing the established roots.
Here’s a workaround: You might need to remove all the LECA, place the new cutting in the desired location, and then refill the pot with LECA or Pon. Yes, it’s a bit of a hassle, but it’s doable.
Adding cuttings to plants in LECA is not as straightforward as in soil. However, with a bit of effort, you can successfully integrate new cuttings into the existing Leca setup. Just be prepared for a bit more work.
What to Do with the Tip After Chopping Moss Pole Plants in LECA or Pon
So you’ve decided to chop your plant that’s been happily growing on a moss pole in Leca. Now the big question: What do you do with the top part of the plant? Is re-rooting necessary?
If you’ve been diligent about keeping your moss pole moist, chances are that part of the plant’s root system has already grown into the moss pole. This makes your job easier.
You can plant the top cutting directly into a new Leca setup, and the existing roots will help sustain the plant until new roots grow into the Leca.
Air Layering for LECA/Pon
What is Air Layering?
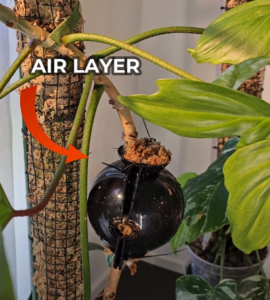
Air layering is a neat trick in the plant world that allows you to encourage root growth on a stem while it’s still attached to the parent plant. This can be especially useful for plants growing on moss poles in Leca, where root development might be focused within the moss pole.
How to Do Air Layering with LECA & Pon
- Select a Spot: Identify a point on the stem where aerial roots are likely to emerge. This is usually a node or a spot where leaves are attached to the stem.
- Prepare a Moss Ball: Take a handful of sphagnum moss or any other propagation medium you prefer and moisten it.
- Attach the Moss: Secure the moss around the selected node using some string, wire, or even plastic wrap. Make sure it’s snug but not too tight.
- Wait: Over time, the moss ball will fill with roots, as the stem recognizes it as a good place to send out new root growth.
Why It’s Useful
Once the moss ball is filled with roots, you can chop the plant.
The top part will already have a well-established root system, making it ready to go into its own LECA-filled pot right away. This minimizes the risk of the top part struggling to survive after being separated from the parent plant.
Air layering takes some foresight, but it can really pay off, especially if you’re concerned about the top part of your moss pole plant struggling after a chop. With an established root system, you’re giving your plant a head start for a healthy life in its new pot.
Root and Stem Rot: How to Avoid
Root or stem rot can occur in any plant, regardless of the growing medium. In the case of plants on moss poles in LECA, rot isn’t usually caused by the moss pole itself but by poor water management.
- Reservoir Management: One common mistake is not managing the water level in the reservoir properly. If your reservoir is too full, it can lead to root rot at the base of the plant. The key is to maintain a balanced water level that keeps the LECA moist but not waterlogged.
- Moss Pole Watering: When you water the moss pole, it’s crucial to let it drain for a bit before placing it back into the reservoir. This prevents oversaturation and keeps the water level in the reservoir at a healthy level.
Concerning stem rot caused by the moss pole, it’s generally not a problem if you’re managing your water levels correctly. Stem rot due to the moss pole is pretty rare and usually not something to worry about.
How to Water a Moss Pole in a LECA Setup
When it comes to watering a plant on a moss pole in a LECA system, you should water the moss pole from the top down. This ensures that the entire moss pole stays moist.
If you water only a portion, you risk having dry spots, which isn’t ideal for the plant’s growth.
While keeping the moss pole moist is important, you also need to manage the water level in the LECA or Pon reservoir. After watering the moss pole, let it stand for a bit to allow excess water to drain out.
This way, the drained water won’t overflow into your reservoir and raise the water level too high.
It’s all about balancing the moisture levels in the moss pole and the reservoir. If your reservoir level gets too high, your plant could become submerged, risking root rot. So after letting the moss pole drain, then you can fill up your reservoir to the desired level.
In short, water both the moss pole and the LECA or Pon reservoir, but manage each separately to ensure optimal moisture for your plant. Allow the moss pole to drain before refilling your reservoir, and you’ll minimize the risk of root rot.
Adding Nutrients to a Moss Pole and LECA Reservoir
Nutrient Solution for Moss Pole
When it comes to adding a nutrient solution, the process is pretty straightforward.
First, water the moss pole with the nutrient solution from the top, allowing it to soak thoroughly.
Let it drain for a while to make sure the excess solution doesn’t end up overflowing your Leca reservoir.
Nutrient Solution for LECA Reservoir
After the moss pole has drained, you can then add the nutrient solution to the Leca reservoir. Make sure you fill it up to the desired level, but not so high that it risks submerging your plant and causing root rot.
The Process
So, in essence, you’ll be adding the nutrient solution to both the moss pole and the Leca reservoir, but doing it in stages.
First, focus on the moss pole, let it drain, and then move on to filling your Leca reservoir.
- Water the moss pole with the nutrient solution.
- Allow the moss pole to drain.
- Fill up the Leca reservoir with the nutrient solution to the desired level.
By following these steps, you’ll ensure that both your moss pole and Leca reservoir have the nutrients they need for optimal plant growth.
The Role of Gravity in Moss Pole Watering
Gravity plays a key part when you’re watering your moss pole. As you water from the top, gravity pulls the liquid downward, helping to distribute the moisture throughout the moss. This ensures that the moss gets uniformly wet, from top to bottom.
While gravity is doing its job, the sphagnum moss itself also has a natural ability to absorb and distribute water, thanks to capillary action. This means that when one part of the moss gets wet, it helps to spread the moisture to adjacent parts.
Typically, the top part of the moss pole will dry out faster due to increased exposure to air and less consistent moisture. The lower parts, being closer to the reservoir and less exposed, tend to stay moist for a longer period.
Sphagnum Moss vs. Tree Fern Fiber vs. LECA
Sphagnum Moss vs. Tree Fern Fiber
In my experience, a moss pole made purely of sphagnum moss tends to dry out faster compared to one that’s a mix of sphagnum moss and tree fern fiber.
So if you’re concerned about frequent watering, a mixed medium might be a better choice.
The thickness of your moss pole can also affect how quickly it dries out. A thinner moss pole will usually dry out quicker than a thicker one.
Your local climate plays a role too. If you live in a hot, dry area, expect your moss pole to dry out more quickly compared to someone living in a cooler, more humid location.
Sphagnum Moss vs. LECA
As for which dries out faster between sphagnum moss and LECA, it depends on various factors like pot size and environmental conditions.
However, LECA generally retains water well and is less likely to dry out quickly compared to sphagnum moss.
Does the Moss Pole Absorb Water from the Plant’s Medium?
The moss pole itself won’t absorb water from the plant’s medium, whether it’s soil or LECA. This is mainly because the moss pole is typically not filled with sphagnum moss all the way to the bottom where it meets the plant’s growing medium.
If you fill the moss pole with sphagnum moss right to the bottom, the moss could draw up all the nutrient solution in a semi-hydroponic setup like LECA.
In soil, the moss would hold onto water for longer periods, keeping the soil too moist. Both scenarios could lead to root rot.
So, in a typical setup:
- For soil: The bottom part of the moss pole is usually filled with the same potting mix as the rest of the pot.
- For LECA: The bottom part is either filled with LECA or left empty.
Will Watering the Moss Pole Disturb the Semi-Hydroponic Setup?
When you’re growing plants in a semi-hydroponic setup, like with LECA or PON, the moisture level isn’t uniform throughout the pot. The bottom near the reservoir is wetter, and as you go upwards, it becomes drier.
Your moss pole, filled with sphagnum moss, is usually situated at the top where the plant is growing. It’s separate from the LECA or PON at the bottom.
You might worry that watering the moss pole could disturb this balance, making the top of the LECA or PON too wet. But here’s the thing: You’re not watering the moss pole constantly. When you do water it, any excess will just drain down to the bottom reservoir.
As long as you’re not overfilling the reservoir, you should be fine. The top layer of LECA or PON will likely dry out quickly due to air exposure, maintaining the moisture gradient you want in a semi-hydro setup.
So, no need to stress. Watering your moss pole shouldn’t mess with your semi-hydro setup. Just keep an eye on the reservoir to make sure it’s not overflowing, and you’re good to go.
What Type of Nutrient Solution Should I Use for Moss Poles?
If you’re already using a semi-hydroponic system with a specific nutrient solution for your reservoir, stick with it for your moss poles too. This way, if any of the solution from the moss pole drains into the reservoir, it won’t mess up the nutrient balance.
Types of Fertilizers
- Semi-hydroponic Fertilizer: Ideal for both your reservoir and moss pole in a semi-hydro setup.
- Mineral Fertilizer: Generally used for soil-based plants.
- Organic Fertilizer: Not recommended for moss poles in a semi-hydroponic setup.
Mixing different types of solutions can lead to an imbalance in your reservoir. For example, if you water your moss pole with plain water, and it seeps into your nutrient-rich reservoir, it could dilute the solution. This change could negatively affect your plant’s growth.
The trick here is to use the same nutrient solution for both the moss pole and the reservoir. This way, even if some of the solution from the moss pole drains into the reservoir, it won’t dilute it or change its nutrient makeup.
Coir Poles vs Moss Poles: What’s the Difference?
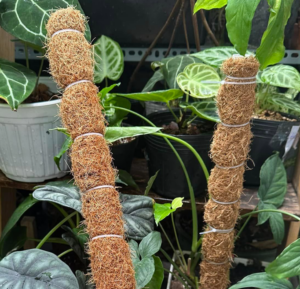
Coir poles are made from the fibrous material found in the husk of coconuts. These fibers are tightly wound around a supporting structure, creating a pole for plants to climb.
The main difference lies in moisture absorption. Coir poles, especially those made from the fiber part of the coconut husk, don’t hold water well.
Moss poles, on the other hand, are made from sphagnum moss or tree fern fiber, which are highly absorbent materials.
- Coir Poles: These primarily offer physical support for your climbing plants. They are not designed to hold water or nutrients.
- Moss Poles: These not only provide support but also hold water and nutrients. When you water a moss pole, the water is absorbed and stored, allowing aerial roots to tap into this reservoir for extra nourishment.
Because moss poles can hold water and nutrients, they offer an added benefit for plant growth. Your plant can grow bigger and stronger as it has access to more than just support; it also gets extra nutrition.
While coir poles are good for providing structural support to your climbing plants, they don’t offer the added benefits of water and nutrient retention that moss poles do. If you’re looking to give your plants an extra boost, moss poles are the way to go.


