Houseplants are a great addition to any home, and many people have been turning to semi-hydroponics in recent years as a better way to cultivate them. Compared to traditional soil-based methods, semi-hydroponics has many advantages.
In this guide, we will help you transition your houseplants to a semi-hydroponic system, ensuring they adapt seamlessly and grow robustly.
By learning and applying the principles of semi-hydroponics, you can create a beautiful and resilient indoor garden that will be the envy of all your friends.
Table of Contents
- 1. Essential Supplies for Easier Semi-Hydroponics Transition
- 2. Selecting the Perfect Pot
- 3. Plant Preparation and Transition
- 4. Water & Oxygen
- 5. Monitoring Root Development
- 6. Water Level Management
- 7. Fertilization Strategies
- 8. Ensuring Proper Air Circulation
- 9. How to successfully convert houseplants to semi-hydroponic system
- 10. Moving succulents/cacti to semi-hydro system
- 11. Plant small seeds in Semi-Hydro successfully
- 12. Dealing with Funky Smells or Rot
- 13. Drooping Leaves
- 14. Overwatering Concerns
- 15. Water Propagation vs. Hydroponics
- 16. Guidance on Fertilization for Passive Hydroponics
- 17. Beneficial Bacteria in Hydroponics
- 18. Choosing the Right Media/Substrate
- 19. Why Consider Dry Periods for Water Roots?
1. Essential Supplies for Easier Semi-Hydroponics Transition
To embark on your semi-hydroponic journey, understanding the essentials is crucial.
Choosing the right substrates is crucial for your plants as they act as a replacement for soil. These substrates should be inert and sterile to provide a suitable environment for the plants.
It’s important that these materials are porous to allow for the exchange of gases, which helps the plants’ roots to get enough oxygen and excess moisture to escape. This also helps to avoid overwatering and other common pitfalls.
Choosing Your Substrates
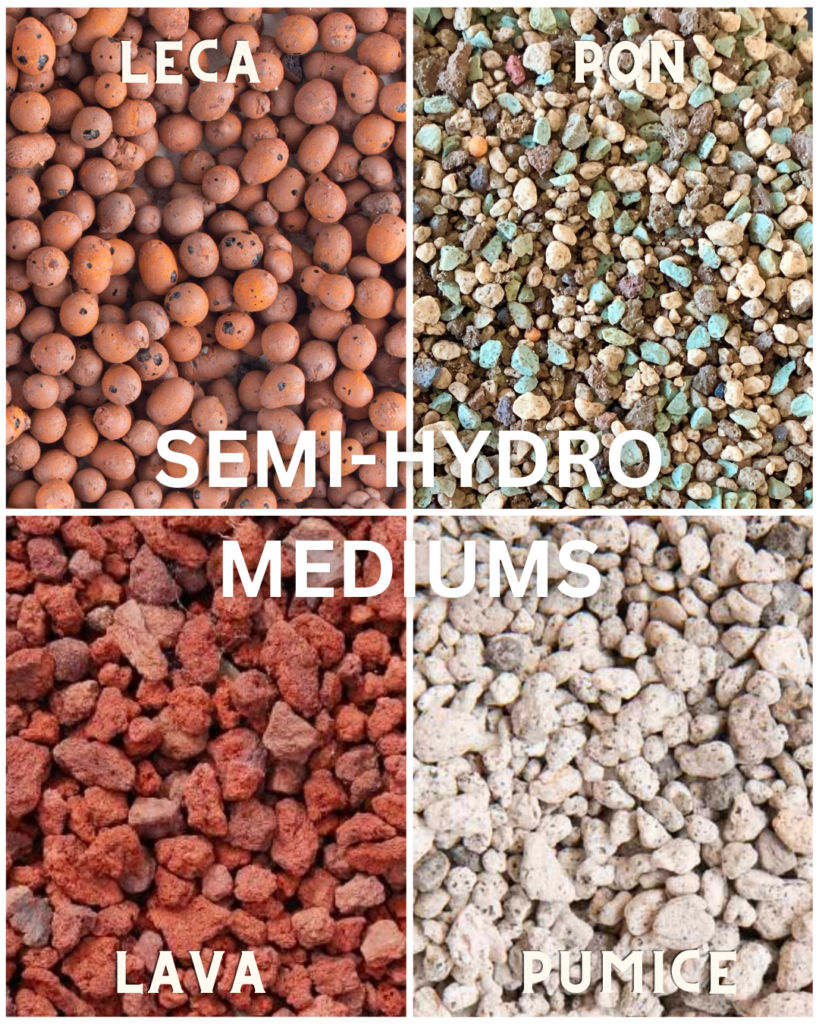
LECA balls, also known as hydroton or clay pebbles, are a popular choice due to their lightweight nature and excellent aeration properties.
Lava rock and pumice are equally effective, offering a more natural aesthetic while still providing the necessary air pockets for root respiration.
These substrates also help maintain a balanced moisture level, which is key to preventing root rot and other water-related issues.
The Importance of Quality
When selecting your materials, quality cannot be overstated. Ensure that the substrates are specifically designed for hydroponic use and are free from contaminants that could harm your plants.
Investing in high-quality materials upfront will pay dividends in the health and vitality of your indoor garden.
2. Selecting the Perfect Pot
Choosing the right container for your semi-hydroponic setup is crucial for its success. It is not just a vessel, but a critical component that can determine the outcome of your transition.
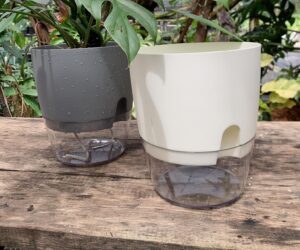
Hydroponic or net pots are specifically designed to provide maximum airflow.
Unlike soil pots, these pots have multiple holes that allow air to circulate freely around the roots. This ensures that they receive the required oxygen to absorb nutrients and water efficiently.
The Right Fit for Your Plants
When selecting a pot, consider the size and growth habit of your plant. A pot that’s too small can restrict root growth, while one that’s too large may hold excessive water, leading to an anaerobic environment.
Finding the right balance is key to ensuring your plant has enough room to grow without being swamped by its surroundings.
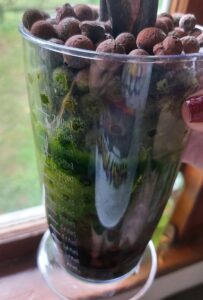
Opaque Containers to Prevent Algae
Light is a friend to your plants but an enemy when it comes to algae growth. Algae thrive in light and moisture, and their presence can lead to a host of problems, including root competition and oxygen depletion.
By choosing opaque containers, you block out the light that algae need to grow, keeping your water reservoir clean and your plants healthy.
3. Plant Preparation and Transition
Gentle Handling During Transition
The transition from soil to semi-hydroponics begins with the delicate process of removing your plant from its current pot. This step must be done with care to minimize stress and damage to the roots.
Gently tease away the soil, being mindful not to break the tender root strands.
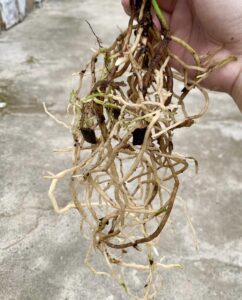
Cleaning the Roots
Once the bulk of the soil is removed, a thorough cleaning is necessary to eliminate any remaining debris.
This can be done by gently rinsing the roots under lukewarm water. The goal is to start with as clean a slate as possible to prevent any soil-borne pathogens from contaminating your semi-hydroponic system.
Inspecting for Health
As you clean, inspect the roots for any signs of disease or decay. Removing unhealthy tissue at this stage is crucial for preventing problems down the line.
Healthy roots are the foundation of a successful semi-hydroponic setup, so take the time to ensure they are in the best possible condition before proceeding.
4. Water & Oxygen
In semi-hydroponics, oxygenation is not just a benefit—it’s a necessity.
Roots need oxygen to convert nutrients into energy for plant growth.
In traditional soil, roots get oxygen from the tiny air pockets within the soil structure.
In semi-hydroponics, we replicate this environment with our choice of substrates and containers, but we must also actively manage the water to ensure it remains oxygen-rich.
Initially, you’ll want to replace the water daily. This might seem excessive, but it’s a critical step in preventing the establishment of anaerobic conditions that can lead to root rot.
By refreshing the water, you’re also flushing out any potential build-up of harmful pathogens and providing a constant supply of oxygen to the roots.
In nature, water is rarely still, and this movement is part of what keeps it oxygenated.
In a semi-hydroponic system, you can mimic this by gently stirring the water when you check on your plants or by using an air pump to keep the water moving.
This not only adds oxygen but also helps to distribute nutrients evenly throughout the reservoir.
5. Monitoring Root Development
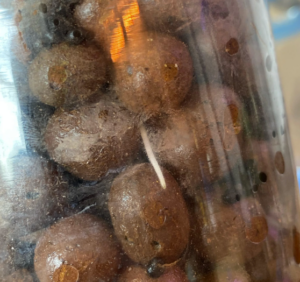
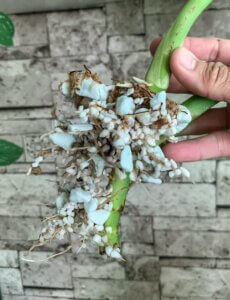
The appearance of new roots is a sign that your plant is adapting to its new semi-hydroponic environment. These roots may look different from soil roots—they’re often whiter and more fibrous.
This is a good thing; it means they’re well-suited to the increased moisture and airflow of the semi-hydroponic system.
Adjusting Water Changes
As your plant establishes itself, you can reduce the frequency of water changes. However, it’s still important to completely refresh the water to prevent nutrient imbalances and the build-up of salts that can occur with top-offs.
This is also a good time to inspect the roots and substrate, removing any debris that may have accumulated.
Balancing Nutrients and Oxygen
Follow the ratio that your fertilizers recommend.
Even as you reduce the frequency of water changes, maintaining a balance between nutrients and oxygen is essential. Too many nutrients can lead to salt build-up, while too little oxygen can cause anaerobic conditions.
It’s a delicate balance that requires regular monitoring and adjustments based on the health of your plant and its growth rate.
6. Water Level Management
The water level in your semi-hydroponic system is a critical factor that influences root health. The goal is to keep the roots moist without submerging them completely, allowing the top portion of the roots to breathe. This is typically at the crown of the plant, where the roots meet the stem.
Different plants have different water level requirements. Some may prefer a higher water level, while others may thrive with less.
Observing your plants’ response to water levels and adjusting accordingly is a key part of the semi-hydroponic art.
Consistency is Key
Maintaining a consistent water level can be challenging, as evaporation and plant uptake will naturally lower the level over time.
Regular checks and adjustments will ensure that your plants always have access to the water they need without being overwhelmed by it.
7. Fertilization Strategies
In semi-hydroponics, plants will initially rely on the nutrients they’ve stored from the soil. Once they’ve used these reserves, you’ll need to start fertilizing.
But timing is everything—wait until you see strong new root growth before introducing any fertilizers.
Choosing the Right Fertilizer!
Liquid hydroponic solutions are often recommended for their ease of use and quick availability to the plant. However, slow-release dry fertilizers like Osmocote or Nutricote can be more economical and less labor-intensive.
They’re mixed into the substrate and release nutrients gradually, which means you can flush your system without washing away all the nutrients.
Gradual Increases
When you do start fertilizing, begin with half the recommended strength and observe how your plants respond.
If they show signs of growth and good health, you can gradually increase the amount.
This slow and steady approach helps prevent nutrient burn and other issues associated with over-fertilization.
Read more: Fertilizers & Nutrients for Semi-Hydro System
8. Ensuring Proper Air Circulation
In a semi-hydroponic indoor setup, air circulation is vital. It not only helps to oxygenate the water but also prevents the stagnation that can lead to mold and mildew.
A simple oscillating fan can provide enough movement to keep the air fresh and reduce the risk of disease.
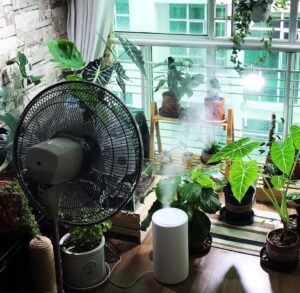
Plants grown outdoors benefit from natural air movement, which helps to strengthen stems and discourage pests. By replicating these conditions indoors, you can promote stronger, healthier growth and a more resilient plant.
Good air circulation isn’t just beneficial for your plants; it’s also healthier for you.
It can reduce the presence of airborne pathogens and create a more pleasant living environment.
So while you’re caring for your plants, you’re also taking care of your own well-being.
By following this detailed guide, you’ll be well-equipped to navigate the intricacies of semi-hydroponics. Each section is designed to address a specific aspect of the transition, ensuring that you can provide the best possible care for your houseplants. With patience and attention to detail, you’ll be rewarded with a vibrant, thriving indoor garden that showcases the beauty and resilience of semi-hydroponically grown plants.
9. How to successfully convert houseplants to semi-hydroponic system
For cuttings, ensure you keep about two to three nodes at the bottom bare. It’s best to minimize the number of leaves to reduce water loss through evaporation and energy consumption, yet still allow the plant to carry out photosynthesis. This technique is common with aquarium plants. I typically leave about two sets of leaves (that’s four leaves) at the top and two to three nodes without leaves at the bottom.
For cuttings without leaves, the process is quite straightforward.
When starting with soil-rooted plants, gently clean the roots and trim them if necessary.
For seed/corm planting, simply place the seeds on top of the substrate and lightly cover them with more of the same substrate.
After positioning the plants, seeds, or cuttings in their pots, water them daily just like you would with traditional soil plants, waiting for strong root growth before proceeding. This initial stage doesn’t require a reservoir pot, making it easier to drain any excess water.
However, if you prefer using a reservoir pot from the start, simply remove the extra water every couple of days or as needed.
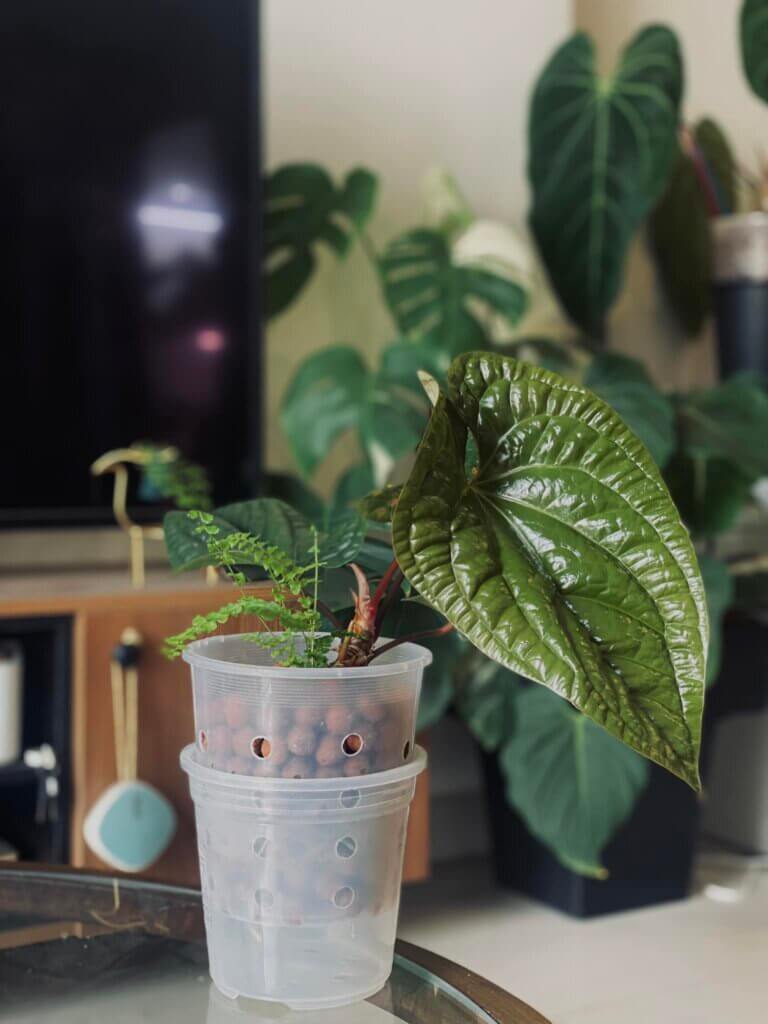
Position these setups in areas with plenty of indirect sunlight or under bright artificial light. Avoid direct sunlight or overly warm locations. Remember, some seeds have specific germination requirements regarding temperature and light exposure.
At no point in the early stages of conversion or germination do you need to apply fertilizer.
A safer method involves placing the specimens in their pots and then adding water to the reservoir pot just enough so that the substrate can wick moisture up to the plant, roots, or seeds. Nest the cache pot inside the reservoir pot, then enclose everything in a clear plastic bag, sealing it shut. You can opt to perforate the bag for ventilation or open it occasionally for fresh air. Keep this arrangement in a spot with bright, indirect light and avoid direct sunlight or high temperatures. Some seeds may need specific conditions to germinate, including absence of light. Regularly check the setup every couple of days, and you should see strong root development or seed germination within two weeks. After this period, you can remove the setup from its sealed environment and continue with regular plant care routines. There’s no need for fertilization during the conversion or germination phase.
10. Moving succulents/cacti to semi-hydro system
Converting succulents and cacti to a passive hydroponic system can be highly successful with the right approach.
Start by cleaning the roots gently and trimming them if necessary.
Place the plants in their new pot.
Initially, water them daily as you would with traditional soil-based plants, waiting until you notice significant root development. At this stage, you don’t need to use a reservoir pot, which makes it easier to get rid of any excess water. However, if you prefer to include a reservoir pot from the beginning, feel free to empty out the surplus water every couple of days or according to your preference.
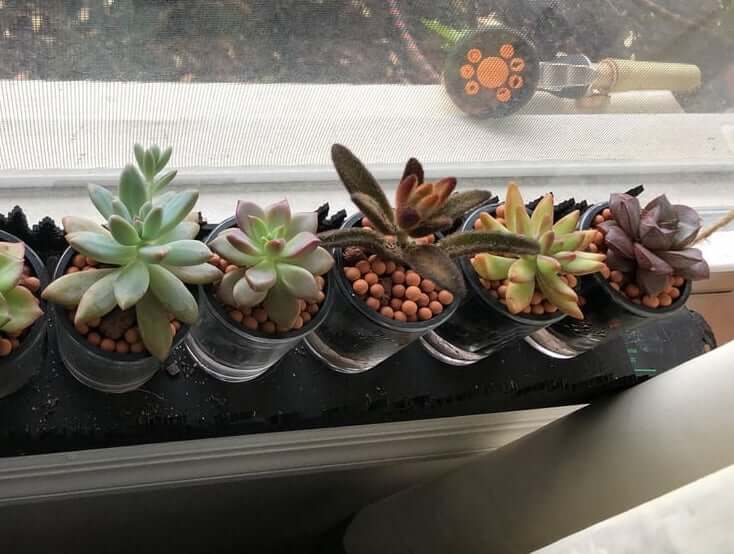
Despite being succulents, these plants shouldn’t be exposed to direct sunlight or placed in excessively warm locations until new, strong roots have formed. Instead, keep them in a spot with bright, indirect sunlight or under bright artificial lighting until you observe the growth of new, healthy roots.
11. Plant small seeds in Semi-Hydro successfully
Successfully planting small seeds in a passive hydroponic system can be straightforward and effective with these steps:
- Use a plastic tub, the kind you might use for storing food in the refrigerator or heating in the microwave. A paper towel can serve as a makeshift bed for the seeds.
- Lightly mist the seeds with water to moisten them, being careful not to overdo it. You want them damp, not soaked.
- Close the tub to create a sealed environment and place it in a dark spot. Remember, certain seeds need specific conditions to germinate, including sensitivity to temperature.
- After the seeds have sprouted, it’s time to move them to your passive hydroponic setup.
- Transfer the young plants into a pot, then encase this in a clear plastic bag to maintain humidity. Position the setup in a location that receives bright, indirect sunlight or is lit by bright artificial lights.
- Allow about two weeks or more for the plant to grow. Once it has reached a certain maturity, you can take it out of the plastic bag.
Throughout the germination phase and until the plant has fully matured (usually taking two weeks or longer), there’s no need to apply fertilizer.
12. Dealing with Funky Smells or Rot
If you notice an unpleasant odor or signs of rotting and wilting in your plants, it’s crucial to address these issues promptly.
A safe and effective way to treat plants affected by pathogens is to remove the affected parts and then soak the plant in a solution of alum, which is made by adding about a tablespoon of alum to a gallon of water.
Alum is a less harsh alternative compared to hydrogen peroxide or bleach, which can be harmful to both plant tissues and humans if not used correctly.
Alum is commonly used in pickling and as a traditional water purifier, and it is generally safer for eliminating pathogens. It is also used in aquariums for quarantining plants from pathogens and snails. You can find alum on Amazon or in the spice aisle of most stores, and it is even used as a natural deodorant in some places.
After the alum soak, thoroughly rinse the plant. If you wish, you can also treat the medium or substrate with an alum soak, or simply rinse it and expose it to sunlight for a UV disinfection.
13. Drooping Leaves
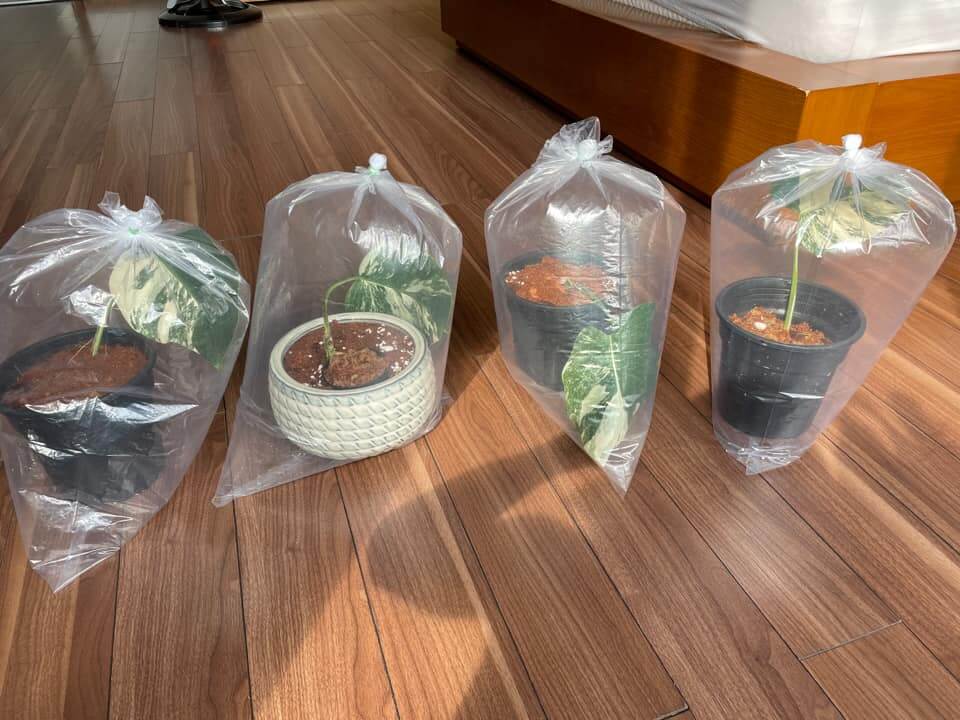
For plants with drooping leaves, placing them in a clear, transparent plastic bag can help maintain humidity and encourage recovery.
Keep the bagged plant in an area with bright, indirect sunlight or under bright artificial lights until it shows signs of improvement, then remove it from the bag.
14. Overwatering Concerns
The concept of overwatering doesn’t apply in the same way to water roots as it does in soil.
Overwatering typically refers to the issues caused by insufficient oxygen reaching the plant’s tissues, similar to how a lack of oxygen would affect an animal.
In aquatic environments, plants thrive submerged, proving that proper water management is about ensuring adequate oxygenation rather than limiting water per se.
15. Water Propagation vs. Hydroponics
Propagating plants in water before transferring them to a semi-hydroponic setup is a practice I find less effective. This method often leads to difficulties because it changes the root environment drastically, which can stress the plant.
If you’re starting with water propagation, consider integrating your medium or substrate from the beginning. This approach effectively creates a semi-hydro system without unnecessary transitions, simplifying the process and enhancing the success rate of propagation.
For those accustomed to soil cultivation, water propagating before planting in soil can also introduce challenges.
Since the plant develops water roots initially, transitioning to soil forces it to adapt once more, which can stress and strain the plant.
It’s generally best to propagate directly in the final growing medium, whether soil or a passive hydroponic setup, to ensure a smoother transition and healthier plant growth.
16. Guidance on Fertilization for Passive Hydroponics
Read more: Semi-hydro Fertilizing Guide
During the initial transition to semi-hydroponics, fertilizing your plants isn’t immediately necessary. Plants typically retain nutrients from their previous environment and can absorb more than they actively process.
This nutrient absorption capability is one reason certain plants are utilized in water filtration systems, as they can remove heavy metals and other pollutants that they don’t necessarily use for growth.
When it comes to fertilization, less is often more. I recommend starting with half the dosage suggested for houseplants and then slowly increasing it, if needed, over several weeks. This gradual approach is crucial because, while full dosages might benefit crops by boosting yields, starting with a lower amount and observing plant response can prevent potential nutrient burn or other negative effects.
Micronutrients, in addition to the primary NPK (nitrogen, phosphorus, and potassium) nutrients, play a vital role in plant health. Some fertilizers include these essential micronutrients, but they can also be sourced from hard tap water. When selecting fertilizers, consider the overall balance of nutrients to support your plants’ growth and health effectively.
Orchid Fertilizer (MSU) K-Lite
- Contains Calcium, Magnesium, and essential micronutrients.
- 100% water-soluble with included scoop and directions. Resealable packaging keeps moisture out.
- Widely regarded as the best orchid fertilizer available, promoting strong, full-bloom potential in orchids and other tropical plants.
- Excellent for Orchids, Anthuriums, Philodendrons, and various tropical plants.
Dry fertilizers tend to offer better cost efficiency compared to liquid options. Opting for dry fertilizers can save money, which can be redirected towards more plants or equipment. They are also easier to incorporate into the medium or substrate, especially if you choose water-soluble types, which are readily available and easy to mix.
Choosing synthetic fertilizers over organic ones can also be advantageous in semi-hydro systems. Organic fertilizers may introduce organic matter that can decompose, potentially leading to rot and providing a food source for bacteria. While beneficial bacteria will naturally establish in your system, minimizing the risk of introducing harmful bacteria or encouraging rot is essential for maintaining healthy plant growth.
17. Beneficial Bacteria in Hydroponics
The effectiveness of commercially available beneficial bacteria, especially in aquarium settings, is a contentious topic. From my perspective, investing in such products may not always be worthwhile. In environments with a high density of plants, such as dirted aquariums or those following the Walstad method, the plants themselves primarily undertake filtration, not bacteria.
Similarly, in a semi-hydro system, beneficial bacteria will naturally establish provided the conditions are right.
If your hydroponic setup is struggling, adding bottled bacteria isn’t a quick fix. Ensuring an oxygen-rich environment, keeping the medium clean, and regular maintenance are key to your plant’s health.
18. Choosing the Right Media/Substrate
The foundation of a successful passive hydroponic setup lies in selecting the appropriate media or substrate.
Options include LECA or hydroton, pon, pumice, lava rock, and perlite. Each has its benefits:
- Lava Rock and Pumice: These are heavier and provide excellent structural support, making them ideal for larger plants.
- LECA/Hydroton and Perlite: These are lighter options, facilitating easier handling and adjustment.
A DIY mix akin to Lechuza Pon can be created using lava rock, pumice, and zeolite in various ratios such as 1:1:1, 2:2:1, 3:3:1, or 2:4:1. Zeolite is optional, and these ratios can be adjusted based on availability. Lechuza Pon includes dry fertilizers, so if you’re creating a similar mix, remember to supplement with your own choice of fertilizers.
For more details, check out our guide on Semi-hydro substrates.
19. Why Consider Dry Periods for Water Roots?
Even plants with water roots can benefit from dry periods.
These intervals can encourage stronger root growth and prevent issues related to over-saturation and lack of oxygen.

