Would you enjoy living in a cluttered space? Probably not, and your plants feel the same way. That’s why prepping your LECA is crucial.
Summary
Prepping Your LECA
Prepping LECA is essential for healthy plant growth. Start by rinsing LECA to remove dust and debris. Follow up with a 24-hour soak in tap water to eliminate impurities. A second soak helps balance the chemical composition, making it safer for plants. Optional steps include a third soak in filtered water and adding supplements like CalMag.
Boiling is optional but recommended for reused LECA.
Properly prepped LECA requires less maintenance and promotes healthier plants.
Why is Prepping LECA Important?
LECA, or Light Expanded Clay Aggregate, is created by heating specially treated clay in a rotating kiln at high temperatures. This process enlarges the clay fivefold.
While the exact pre-treatment of the clay remains a bit of a secret, it likely involves certain chemicals and binders that help the clay expand into small, rounded forms. During the heating process, some of these chemicals may become inactive or evaporate, but there’s still some residual “gunk” left in these LECA balls.
After exiting the kiln, these balls are cooled down with water, but what’s in that water?
You might think, “I just rinse it off and use it, and my plants are doing fine!”—a sentiment echoed by many online. While that’s true to an extent, it’s like saying you’re okay living in a messy home. You might manage, but it’s far from ideal.
Properly treating your LECA before use is a smart move. It ensures that your plants start their semi-hydroponic journey on the right foot. Inadequately soaked LECA can slow down plant growth
In my year-long experience with LECA, I’ve found that well-soaked LECA needs less frequent flushing compared to its poorly-soaked counterpart.
So, if you’re looking to cut corners, choose wisely. For me, spending a few days prepping LECA is a small price to pay for less frequent maintenance later on.
Read more: Why you should use LECA
How to Prepare your LECA: Step by Step

Step 1: Flush Your LECA
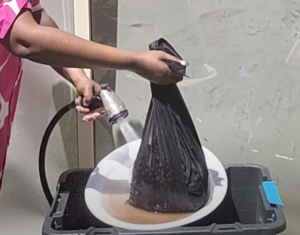
Start by removing the LECA from its packaging and rinsing it well to eliminate any dust or small particles.
Use a mesh laundry bag and your garden hose for this task. Doing it outdoors helps you avoid clogging your pipes with clay dust.
Step 2: The Initial Soak
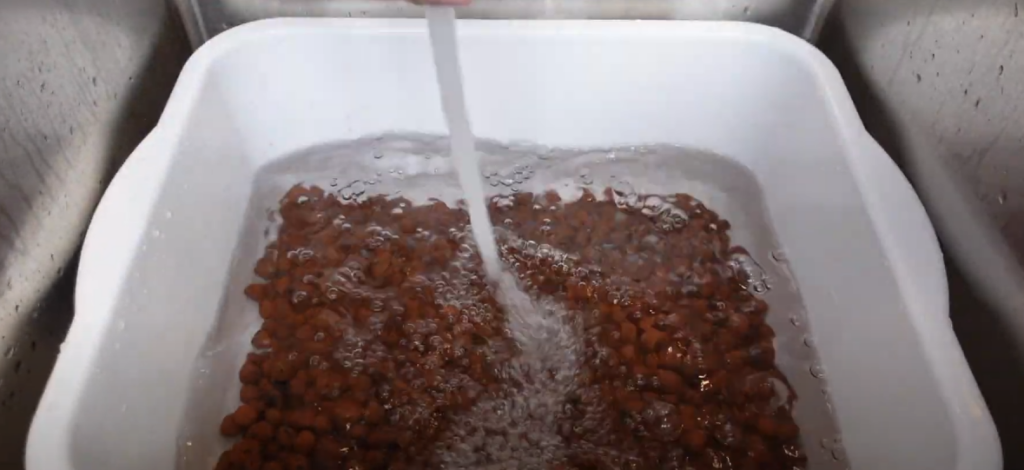
Submerge the LECA in tap or hose water for a full day. This 24-hour soak helps remove the first layer of impurities from the LECA.
If you’re not in a rush, extend the first soak for more than two days. Patience pays off here!
A large plastic container works great for soaking. You can fit about 50L of LECA into two mesh laundry bags.
Science Corner: Check the PPM (parts per million) of the water after the first soak. For context, tap water usually has a PPM around 150, but after soaking, LECA can show a PPM of 800. That’s a lot of extra stuff you don’t want in your plants!

Step 3: The Follow-Up Soak
Empty the used water and refill with fresh tap or hose water for another 24-hour soak. This step is crucial, especially for high-value plants that need a clean start.
The second soak usually lowers the PPM to around 300-400. The goal is to balance the chemical composition inside and outside the LECA, making it safer for your plants.
Step 4: Dry and Store (Optional)
If you’re not planning to use the LECA immediately, it’s a good idea to let it dry. Mesh laundry bags offer excellent airflow for this purpose.
Prepare your LECA during the summer for winter use. If it rains while your LECA is outside, consider it a bonus rinse from Mother Nature! Just remember to bring your bags inside afterward.
Step 5: The Final Soak for Extra Care
For those who want the best for their plants, a third soak in filtered or distilled water is recommended.
Some even suggest soaking LECA for over two weeks, especially if you’re reusing it. Always use wet LECA, never dry.
Consider adding CalMag and rooting hormones like KLN during any of the soaking stages. These supplements replace less desirable minerals in the LECA.
Dry LECA can pull moisture away from plant roots, causing them to dry out. Always ensure your LECA is well-soaked before use.
Quick Tip: Keep a couple of buckets filled with LECA soaking in CalMag and KLN. They can sit for weeks before you need them.

Do You Really Need to Boil LECA?
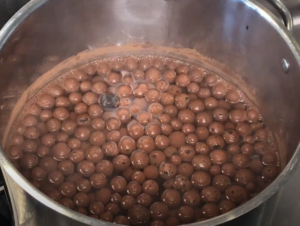
Boiling LECA is an option, especially after the second soak. However, I find it a bit overkill since LECA has already been fired in a rotary kiln. If you’re dealing with high-value plants, boiling could offer extra sterilization. But for new LECA, I usually skip this step. I have alternative methods for tackling issues like mold or bacteria.
If you’re planning to reuse LECA, then yes, boiling is a must. Stay tuned for a future guide on how to safely reuse LECA.


