Are you ready to grow your spider plant family and witness the magic of propagation?
In today’s article, we’ll explore the fascinating world of spider plant propagation. Whether you’re a seasoned plant enthusiast or just starting your green journey, we’ve got you covered with three simple methods for expanding your spider plant collection.
Stick with us to discover which method delivered the best results for my own plants.
Selecting Mother Plant for Spider Plant Propagation
Before we jump into the fascinating world of spider plant propagation, it’s crucial to choose the right mother plant. A healthy, mature spider plant is the foundation of successful propagation.

Here’s what you need to do:
- Choose a Healthy Mother Plant: Look for a mature spider plant that’s thriving. Healthy mother plants will have lush, vibrant green leaves and show no signs of disease or stress. Ensure that the plant has at least a few mature leaves.
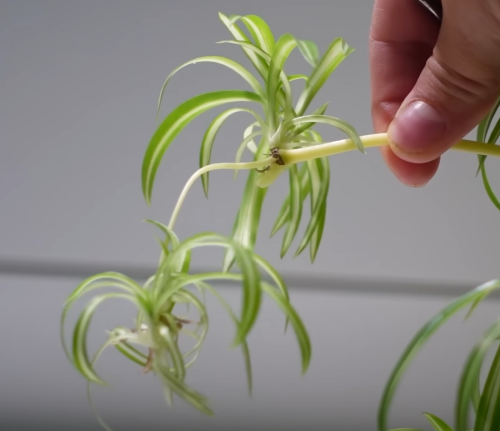
- Inspect the Spiderettes: Spiderettes are the tiny plantlets that grow at the ends of long, arching stems. These are the offspring you’ll be propagating. Select one of these spiderettes that is well-developed and has its own roots. This will ensure a higher chance of successful propagation.
- Gently Remove the Spiderette: Carefully detach the chosen spiderette from the mother plant. You can do this by snipping it off with clean, sharp scissors or pruning shears. Be mindful not to damage the mother plant or the spiderette during this process.
With your healthy spiderette in hand, you’re ready to explore the first method of spider plant propagation: water propagation. This method is simple and effective, making it an excellent choice for beginners and seasoned plant enthusiasts alike.
Spider Plant Water Propagation

The first method of propagating spider plants involves water, offering a perfect starting point for beginners and a chance to witness the fascinating growth process firsthand. Here’s how you can do it:
What You’ll Need:
- A healthy spiderette or spider baby plant
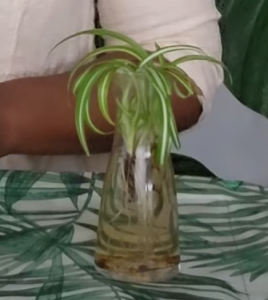
- A clean glass jar filled with water
Tip: Instead of using regular water, I prefer to use a special mixture that combines Clonex Clone Solution and Root Zone, enhancing root health and nourishing the plant. It’s a secret mix that can work wonders for your spiderette’s growth.
- Prepare the Spiderette: Take your chosen spiderette and gently place it in the glass jar, ensuring that its base is submerged in the water or your special sauce mixture.
- Water Propagation Care Tips:
- Proper Lighting: Place the jar in a well-lit area, but make sure it’s away from direct sunlight. Excessive sunlight can harm the plant, so a bright, indirect light source is ideal.
- Regular Water Changes: Change the water or special sauce every few days, at least once a week. This prevents stagnation and allows fresh oxygen to reach the spiderette, promoting healthy growth.
- Root Growth: After a few weeks, you’ll start to notice tiny roots emerging from the base of the spiderette. Once these roots are at least an inch or so long, you can proceed to transfer the spiderette into the growing medium of your choice, whether it’s LECA, Pon or soil.
By following these steps, you’ll be well on your way to successfully propagating your spider plant using water. It’s an exciting process that allows you to observe your plant’s growth and expand your spider plant family.
Spider Plant Perlite Propagation

Perlite is a lightweight, porous volcanic material that’s commonly used in gardening to enhance soil aeration and drainage. It’s an excellent medium for propagating spider plants.
Here’s how you can do it:
What You’ll Need:
- A spiderette (or spider baby plant)
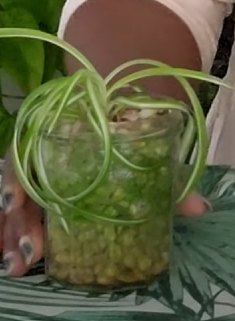
- A small container filled with washed and moistened perlite
Preparing the Perlite:
Before using perlite for propagation, it’s essential to prepare it properly.
Start by washing your perlite with normal tap water. This step helps remove dust, debris, and any impurities that might be present.
For an extra boost, perform a final rinse with the special sauce we mentioned earlier. This ensures that the perlite is evenly coated with the solution, promoting root health and nourishing the plant.
Planting Your Spiderette:
- Place the spiderette into the container filled with the moistened perlite, ensuring that you bury the roots deep enough to stabilize the plant.
- Fill the container with the special sauce mixture, providing your spiderette with the necessary nutrients to thrive.
Perlite Propagation Care Tips:
- Proper Lighting: Just like with water propagation, keep the container in a well-lit area. Avoid direct sunlight, as it can scorch the plant’s delicate leaves. A bright, indirect light source is best.
- Monitor Growth: Within a few weeks, you’ll notice the development of roots on your spiderette. This is a sign that it’s ready to be transferred into the next growing medium, whether it’s LECA, soil, or any other medium of your choice.
Spider Plant LECA Propagation

Method number three in our spider plant propagation journey is the use of LECA (Lightweight Expanded Clay Aggregate), a soilless medium commonly used in hydroponics and as a substrate for plant propagation.
Here’s how you can successfully propagate spider plants using LECA:
What You’ll Need:
- Healthy spider plants
- A container filled with LECA pellets
Preparing the LECA:
Before you begin, ensure that your LECA has been soaking in the special sauce or a rooting solution for a minimum of 24 hours. This helps prepare the LECA for optimal root growth.
Planting Your Spiderette:
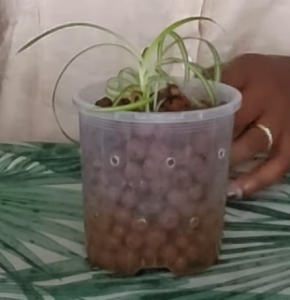
- Fill the pot approximately one-third of the way up with the pre-soaked LECA.
- Place your spider plant directly on top of the LECA. If your spider plants are particularly small, you may need to fill the pot a bit higher than one-third to ensure stability.
- Fill the rest of the pot with LECA, ensuring the plant is well-supported.
Caring for Your Spider Plant:
- Find a bright, warm spot for your potted spider plant. However, avoid exposing it to direct sunlight, as this can damage the plant’s leaves.
Results: What medium is the best for propagating Spider Plant?
Perlite Propagation: Our spiderette placed in perlite is not only still alive but looking robust and healthy. The roots are thriving, providing a strong foundation for future growth.
LECA Propagation: The spiderette in LECA is also flourishing. It’s producing roots and the beginnings of tubers, which is an interesting twist we didn’t quite anticipate. This suggests that LECA might encourage the development of tubers more effectively.
Water Propagation: The spiderette in the special sauce solution is doing well. It stands out with its lush leaves, and while it might not have as many tubers as the LECA plant, it appears to allocate its energy toward creating beautiful foliage.
Key Takeaways: Our experiment reveals that all three propagation methods are successful, and your spider plant will thrive regardless of the approach you choose.
Each method has its unique strengths. Perlite provides thick roots, LECA seems to promote tuber formation, and the special sauce solution yields excellent leaf quality.
So, you have the flexibility to choose the method that suits your preferences and plant care goals.
Conclusion
If you’re looking to propagate a spider plant, perlite might be your go-to option. It offers the most value for your efforts. Not only did it result in healthy, vibrant leaves, but the roots were thriving and robust. The combination of lush foliage and fantastic root growth makes perlite a top contender.
Now that the spiderettes are ready for the next phase of their journey, make sure to remove any dead or dying leaves. With their readiness, it’s time to bring them together in one pot. This consolidation will not only simplify care but also create a stunning display of spider plants.

