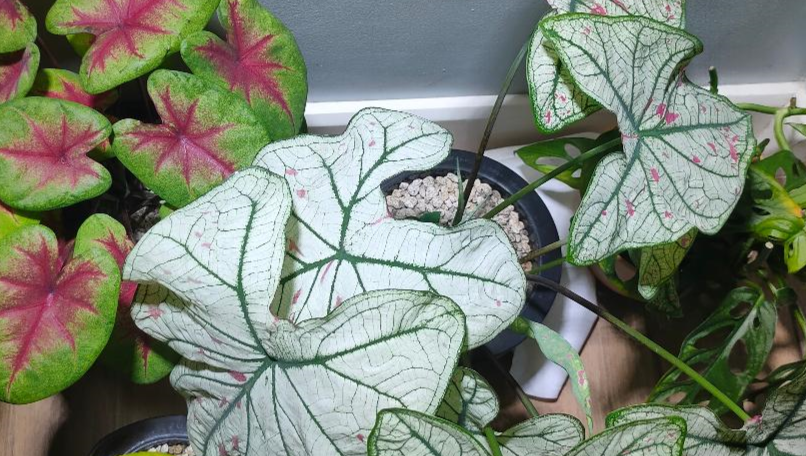
Introducing the Pumice Semi-Hydro Method—a balanced, effective, and simpler approach to plant care that combines the best of both worlds. Inspired by the Swedish Plantguys but with a twist, this method is all about making plant care less stressful and more rewarding.
Let’s dive in!

What is the Pumice Semi-Hydro Method?
The Pumice Semi-Hydro Method is a slightly adjusted version of the original method discussed by the Swedish Plantguys on their YouTube channel. If you’re new to their content, they’re a treasure trove of plant care tips and troubleshooting advice.
They’ve been growing plants in pumice for over a decade, and their approach is pretty straightforward.
How Does It Work?
The core idea is simple: Plant your soil root ball in a pot and surround it entirely with pumice. You also leave a space at the bottom for a water reservoir. A wicking material then draws water from this reservoir to the soil root ball.
Sound familiar?
If you’ve dabbled in semi-hydroponics, it should! Pumice shares many features with LECA (Lightweight Expanded Clay Aggregate). It absorbs water and distributes it evenly while also allowing for air pockets.
Over time, your plant’s roots will grow into this reservoir, much like they would in a LECA setup.
Why Choose the Pumice Semi-Hydro Method?
In this method, pumice works in harmony with a soil root ball. This combination offers consistent moisture without waterlogging, as pumice absorbs only about 30% of its weight in water. Your plant’s roots will gradually adapt to this airy environment.
Periodic flushing helps to wash away any remaining soil, although this could take a few years.
But don’t worry—your plant will flourish with both soil and pumice.
Concerned About Root Rot?
You might be wondering if constant moisture will lead to root rot. The answer is no. Root rot usually happens due to a lack of air, not excess moisture.
Pumice ensures good aeration, making this setup safe for your plants.
Is the Pumice Semi-Hydro Method for Every Plant?
Absolutely, yes! Even drought-tolerant plants can thrive in this setup. The key is to skip the reservoir and flush the pumice with nutrient water occasionally. This allows for longer breaks between watering sessions.
My Personal Experience
I find the Pumice Semi-Hydro Method ideal for water-sensitive plants like African violets and calatheas.
While I generally prefer full semi-hydroponics with LECA, I opt for this method for certain plants that may not transition well to LECA right away.
I’ve successfully used this method for plants with moderate water needs, like Tradescantia and Philodendron Brazil, from the start.
Bonus Tip
One cool perk of this method is that it lets you maintain the existing structure of vining plants. Since the root ball stays put, your plant can easily expand into the airy pumice around it.
For instance, my teddy bear tradescantia has kept its original shape, making it much easier to manage.
How to Pot Using the Pumice Semi-Hydro Method
Ready to give the Pumice Semi-Hydro Method a try? Here’s a step-by-step guide to help you get started.
Supplies You’ll Need
- Pumice (aim for pieces between 1/8 to 3/8 inch in size)
- Your chosen pot (any setup explained here would work)
- Aquarium rocks (optional, for looks)
- Your plant
Step 1: Clean the Pumice
Start by rinsing your pumice and any optional aquarium rocks you’re using.

Step 2: Unpot Your Plant
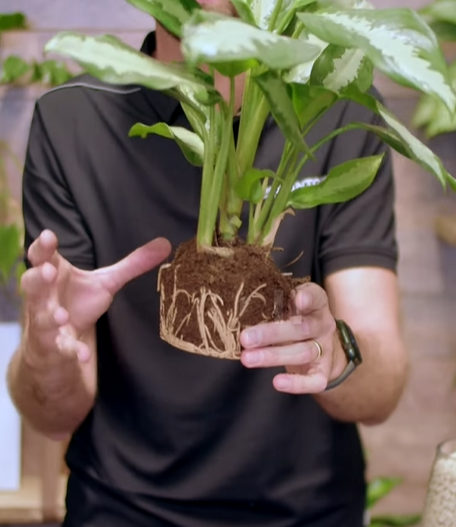
Carefully remove your plant from its current pot. Brush off any loose soil from the root ball, especially from the top.
Some plants may have more roots and less loose soil, while others might be the opposite.
Try to remove as much soil as you can without harming the existing roots.
Step 3: Pick the Right Pot Size
Choosing the right pot size can be a bit tricky. The size of the remaining soil root ball will guide you.
If you want to plan ahead, you can opt for a pot that’s one or two sizes larger than the current one. Just remember, some plants prefer being root-bound, like African violets.
Make sure there’s at least an inch of space between the pot’s sides and the root ball, and that the pumice can fully surround it.
Step 4: Add the First Layer of Pumice
If you’re using a single pot, leave about a third of the space at the bottom for a water reservoir. The soil root ball should never touch this area.

If you’re using an NSW pot with a wick, thread the wick first. Then add your first layer of pumice and lay the wick on top of it.
Step 5: Place the Root Ball and Add More Pumice
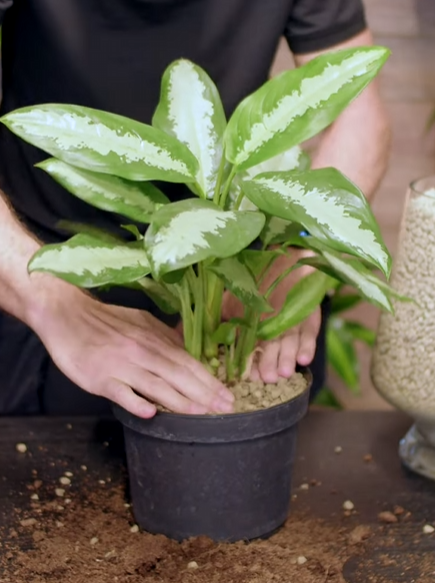
By now, you should have a good idea of how much space is left in the pot. Place the root ball on the first layer of pumice and then fill the pot with more pumice around and on top of the root ball.
You might need to gently squeeze the pot’s sides to help the pumice settle into any gaps.
Step 6 (Optional): Add Aquarium Rocks
If you’d like, you can add a layer of rinsed aquarium rocks on top of the pumice.
This is mainly for aesthetic reasons and is optional if your plant’s foliage already covers the pot’s top.
Step 7: Water Your Plant
Use nutrient water for this step, following the same guidelines as you would for plants potted in LECA. From here on, just refill, flush, and top up as needed.
Side Note
If you ever want to switch to LECA or PON, you can definitely do so. I’ve personally moved a few plants to PON, which has a similar particle size to pumice. The transition was pretty smooth, with minimal stress to the plants.
And there you have it! You’re now ready to pot your plants using the Pumice Semi-Hydro Method. Happy planting!
Is this Pumice Semi-Hydro Method Just a Copy of the Swedish Plantguys’ Approach?
While the Swedish Plantguys offer valuable insights into pumice planting, their explanation can be a bit complicated and, in some aspects, incorrect.
One point they stress is the need to mix clay with pumice for effective cation exchange capacity (CEC). CEC is essentially how well a planting medium holds onto nutrients. A higher CEC means the medium retains more nutrients, making them less available to the plant.
Both LECA and pumice have low CEC, which is why continuous fertilization is crucial in semi-hydro setups.
The Swedish Plantguys are experts in soil growing but are skeptical about semi-hydroponics. They advise against transferring plants to semi-hydro setups, arguing it’s too stressful for the plants. However, many have successfully transitioned plants to semi-hydroponics with minimal stress, depending on the plant type.
They also claim that pumice doesn’t wick nutrients effectively, only water. They suggest adding a high-CEC material like powdered clay to the mix to hold onto nutrients. This point is where I respectfully disagree.
The Benefits of Low CEC
Low CEC can actually be a good thing. High CEC substrates not only hold onto nutrients but also make them less accessible to plants. In semi-hydro setups, low CEC means that nutrients in the water are readily available to the plant—no hoarding involved.
The Wicking Debate
Contrary to the Swedish Plantguys’ belief, both LECA and pumice do wick nutrients along with water. There’s no need to add high-CEC materials that could potentially withhold nutrients from the plant.
Expert Opinion
Ray Barkalow, who has over 45 years of experience growing orchids in LECA, supports this view. According to him, in media with virtually no CEC, nutrients tend to stay in solution and remain available to plants.
The Bottom Line
While the Swedish Plantguys’ method is insightful, it’s not the final word on pumice planting.
The Pumice Semi-Hydro Method works just as well without the need for additional materials like clay. It’s a simpler, more straightforward approach that makes nutrients readily available to your plants.
So why complicate things when you don’t have to?


